Showing posts with label FODMAPS. Show all posts

Thursday, September 25, 2014

Blueberry and zucchini muffins -FODMAPs friendly

Being the mother of a three year old, I'm always keen to get said three year old to eat vegetables. She is actually pretty good with it, but you can never have too many veggies and she has become rather enamoured of the muffins found at the supermarket nearby. They are not fabulously healthy items, so I thought I'd try and make some at home to ensure that if she was eating a muffin, it was also benefiting her health.

I googled and found a blueberry and zucchini muffin recipe that I then adapted to make it low FODMAPs. 

I present said recipe here for your enjoyment. Photos to come when there are some left. I didn't get a chance to photograph any before TWO (the wee one) decided to eat them all.

Ingredients


1 1/2 cups gluten free flour mix

1/2 cup white sugar

1/4 cup brown sugar

2 teaspoons baking powder (if you make this with regular flour, use only 1 teaspoon)

1 teaspoon ground cinnamon

1/2 cup olive oil

1/4 cup lactose free milk

1 egg

1 1/2 teaspoons vanilla extract

1 cup grated zucchini

3/4 cup frozen blueberries

Method


Preheat oven to 180 degrees C.

Mix all the ingredients together with help from the small person until well mixed. The mixture will probably appear quite runny. It works anyway and they are incredibly moist.

Cook in the oven until a skewer comes out clean. About 15-20 mins. I didn't really time it just went back and tested them. 


I made these in a small muffin tin that fit 24 mini muffins in a tray and I got a tray and a half out of it. Next batch will be large muffins and photos will be forthcoming. 

Thursday, September 18, 2014

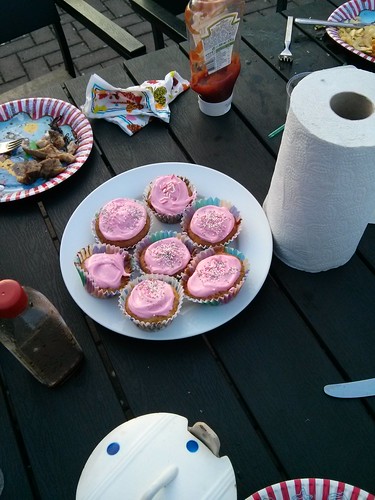
Moist vanilla cupcakes with cream cheese icing - FODMAPs friendly

cupcakes

Last night we had friends over for a late summer/early autumn BBQ. The weather has been unseasonably warm. The whole summer has been the hottest and longest one since we moved here 5 years ago. We thought it best to take our possibly last opportunity to enjoy eating outdoors.

I adapted a Sue Shepherd cake recipe to make vanilla cupcakes instead of a big chocolate cake and I can definitely call it a success. I changed out the cocoa for soy flour. I know that some people still react to soy flour and I have plans to try a different flour combination next time I make these to see if it still works. But personally I have no problem with small quantities of soy flour in baking. 

In any case, these cupcakes were indeed moist. The icing/frosting was pink at the request of TWO and incredibly tasty. The recipe ended up making about 30 cupcakes. I have a whole bunch still left in my fridge and they are very very tempting. 

I bring you : moist vanilla cupcakes with cream cheese icing!


Ingredients

130g rice flour
75g corn flour
90g potato flour
70g soy flour
2 tsp baking powder
1 tsp bicarbonate of soda
1 tsp xanthan gum
2 eggs
1 1/2 cups sugar
50g unsalted butter, melted
200g lactose free vanilla yoghurt 
2/3 cup lactose free milk
1 tsp vanilla essence

Method

Preheat oven to 170 degrees C.

Whisk the eggs and sugar until well combined. Add melted butter, yoghurt, vanilla and milk and stir. 

Sift dry ingredients together in a large bowl.

Add the wet to the dry and mix well with electric beaters. 

Fill cupcake moulds two thirds full and bake for 10-15 mins. They are ready when they are firm to the touch and slightly golden. The standard skewer inserted into the middle of the cake coming out clean is a good test. 

Cool and while they are doing that, make the icing/frosting.

Icing instructions


200g icing sugar
1 packet lactose free cream cheese
food dye of choice

Get the ingredients together in a bowl and mix with electric beaters until they are a lovely mix of sugary goodness. 

Ice as you like and add sprinkles if it floats your boat. The only thing left after this step is to enjoy. I sure did. 


cupcake

Sunday, August 17, 2014

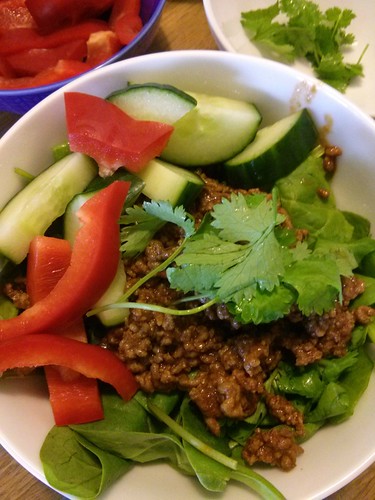
Tex-Mex low carb mince -FODMAPs friendly

dinner

Our household has always been enthusiastic about Tex-Mex food. For my 23rd birthday the boy got me a Mexican cookbook. It was really good but was really written for a US audience who have ready access to Hispanic grocery stores. However, we took a fair bit out of the book in terms of flavour combinations. 

I made up this recipe for mince when adapting one of the recipes from my book. I use very approximate measures for the spices and taste as I go along. It is actually a very quick meal to prepare. We serve it with a salad and TWO gets corn chips with hers. I occasionally have corn chips with mine too, depending on how high my FODMAPs load has been that day. Corn is moderate when it comes to FODMAPs and should be limited. 

Ingredients

500g minced beef
garlic oil
2-3 tablespoons cumin
2-3 tablespoons dried oregano
3 bay leaves
1/2 - 1 teaspoon ground cinnamon
1/2-1 teaspoon dried paprika
1 large dessert/tablespoon tomato paste
a little bit of water (yay for accurate measures)
a splash of balsamic vinegar
salt to taste

To serve: 
Baby spinach leaves
Red capsicum/bell pepper chopped
coriander leaves
cucumber slices
lactose free sour cream (if available)
grated cheddar cheese
lime wedge, if you so desire
corn chips, optional


Method

Fry the herbs in garlic oil on a medium/high heat in a frying pan or saucepan until aromatic. This takes a few minutes. 

Add the beef and brown it up. 

Splash in the vinegar and add the tomato paste. Stir through and if it looks like it could do with some moisture add a bit of water. I usually just add a little bit at this stage, usually from my kettle.

Reduce heat way down and let it simmer with the lid on for 20-30 minutes or until you are ready to eat.

Always before serving I check to make sure that the taste is right. I usually end up adding a bit of salt at the end and maybe a little more vinegar. I'm a bit of a fan of sour food. 

Serve in a bowl with your salad items underneath and mince piled on top with sour cream and cheese. 

You can even serve this with some of my FODMAPs friendly salsa but it won't be quite so low carb as it currently is. But it will no doubt be tasty. The salsa has a pretty similar herb profile and I love it. 

Enjoy! I know I did. 

Friday, August 08, 2014

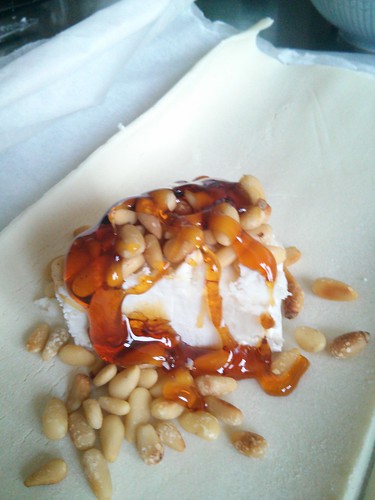
FODMAPs friendly dessert - goat's cheese, pine nut and golden syrup parcels

Goat's cheese pine nuts and golden syrup- yum!

I recently bought some gluten free puff pastry at the supermarket and it has been sitting in my freezer, waiting for me to find a use for it. It's also lactose free, perfect for FODMAPs. 

I also had some goat's cheese in the fridge that had to be eaten. I double checked the Monash app to see if it was safe and was ever so pleased to see that it was indeed safe on FODMAPs and I could go nuts.

This recipe I'm about to share is one that a friend used at a dinner we had years ago that I remembered fondly. But it included puff pastry and honey, so I wasn't sure I'd ever be able to use it again. But with the gluten free pastry and my new homemade golden syrup I figured it couldn't hurt to try. And I was rewarded. I ate this last night and I can report that today my belly is still happy with me.

Ingredients

1 sheet of gluten free pastry
goat's cheese
pine nuts, toasted
golden syrup 
milk for brushing

Method

Preheat the oven to 180 degrees C 

Toast the pine nuts in a frying pan

Spread out the pastry on some baking paper on the oven tray

Cut into rectangles and place a piece of goat's cheese at one end

Take 1-2 tablespoons of the toasted pine nuts and sprinkle them over the cheese

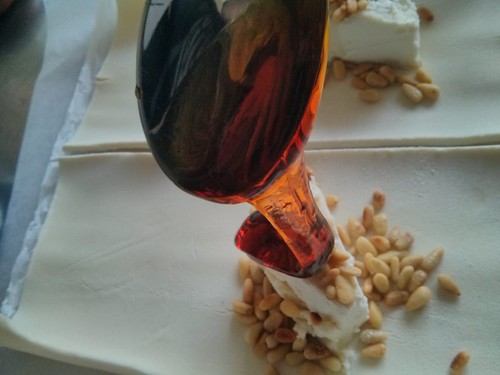
Take 1-2 tablespoons of golden syrup and drizzle over the cheese/nut combo

Drizzle
See the lovely drizzle action there? YUM!

Fold the pastry over and seal using milk and brush the tops of the parcels with a little more milk

Into the oven for between 20-30 mins. I based my decision on when to remove them by a browned top and golden syrup leaking out the sides. 

Allow to cool for a few mins before serving. Remember the cheese inside is hot. Tasty, but hot. 

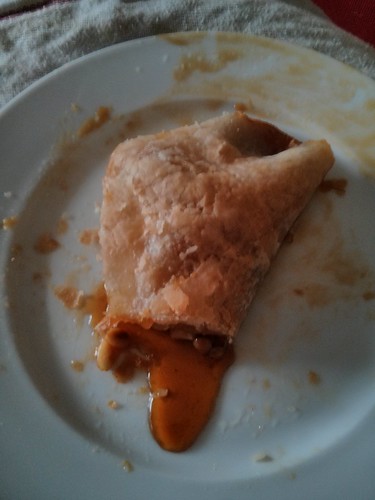
And here is a crappy photo of what it looked like on my knee last night as I ate it in front of the TV. 

Dessert

Wednesday, July 23, 2014

Making my own golden syrup, a tale of laziness combined with too much time on my hands -FODMAPS friendly

golden syrup number the two
Last winter I was trying to make something that I could eat for my Swedish class's Xmas party. I thought I would make the Australian classic biscuit,  ANZACs. Great idea, I thought. The only problem was I didn't have any golden syrup. I also didn't have the desire to go out in the December weather, I think it was snowing at the time, to go and buy some syrup. 

So that's what led me to google how to make my own. How hard could it be, I reasoned? 

It turned out to be not so difficult once I learned a few more things that the youtube video I was looking at failed to mention, like not stirring while the sugar is caramelising. I managed to repeatedly crystallise the sugar again until I discovered the solution. 

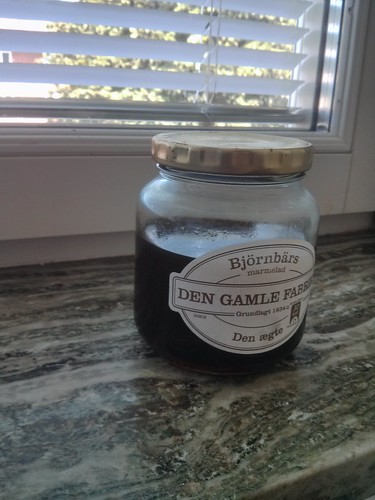
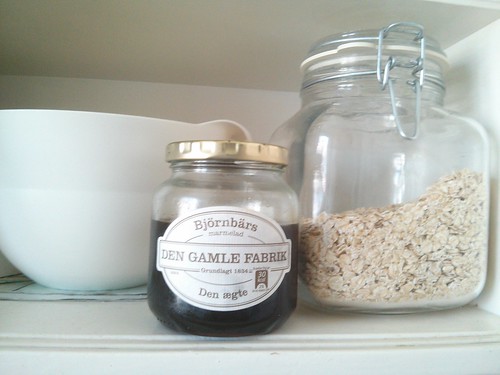
The golden syrup was duly made and tasted a bit fantastic. So much so that I was forced to make some more again recently. It now lives in an old jam jar in my fridge and the most recent effort is a little thicker and has a richer, more toffee like flavour to it. 

If you fancy making it, here's what the video will show you, written out for your viewing pleasure. 


Things you will need to have ready:

100g sugar to start
with 2 tablespoons water to dissolve

500g sugar to add later
300ml boiling water. The boiling part is important

A slice of lemon, or lemon juice. 


Start with :

-100g sugar
-2 tablespoons of water

Dissolve the sugar in the water and cook over a medium heat. Unlike the video, don't keep stirring once it is dissolved, but just wait for it to caramelise.

When it is a good colour add the boiling water, but slowly.  It will be very hot and you could get burned. Add about a tablespoon at a time and stand well back.

Once the boiling water has been added, dump in your remaining 500g of sugar and stir until it is dissolved.

Simmer for about 45 mins with a slice of lemon in there or juice from about half a lemon. What you need is some acid to help prevent crystallisation of the syrup afterwards. So if you don't have a lemon handy, some vinegar would also work. 

Once it is finished simmering, allow to cool and then sieve out the bits while pouring the syrup into a clean jar. In my case it was an old blackberry jam jar. 

Store in the fridge and enjoy. I've been using the syrup for baking and also to sweeten chia seed puddings. I'm not entirely sold on chia seeds. I think they are bit a of gimmick. But the puddings I've made (recipes to come soon) have been tasty, fodmaps friendly, and, the best bit, easy.

golden syrup

Edit note: There is some debate as to whether invert syrups are entirely safe on the low FODMAPs diet. I've found this one not to be a problem for me personally. But I know that we are all different when it comes to intolerances. So if you are on the elimination phase of the diet, I would perhaps give golden syrup a miss until you are ready for some challenges. 


Monday, July 14, 2014

Chicken soup -FODMAPS friendly

I used to make a chicken soup back at uni that was quick and tasty. I got the recipe from my friend Steph (link to her website there), and have subsequently forgotten the specific details of it. But there were a few things that stuck out, coriander, ginger and so very much flavour. 

So in an attempt to recreate the soup she taught me to make, and to make sure it was low FODMAPs, I made up my own version of her recipe using the chicken stock that we make regularly at home now. 

Ingredients


Some chicken stock, we usually end up with about a litre
Chicken thigh fillets 
1 bunch of fresh coriander/cilantro
1-2 tablespoons of fresh grated ginger
salt/pepper to taste
juice of one lemon
garlic oil
1/2 tsp chilli paste (optional)
small packet of rice vermicelli noodles (optional) 


Method


If you are using the noodles, set them into a heatproof bowl and cover with boiling water while you prepare the rest of the soup. Drain after 10 or so minutes and set aside.
 
Fry the ginger in garlic oil on a medium high heat until fragrant and add the chicken pieces.

Fry the chicken fillets on the higher heat for a few minutes, until they start to brown/seal. Then add the lemon juice and reduce the heat. Cover.

(I use an electric cooktop because it is almost impossible to get gas in Sweden. By medium high I mean a 5 out of 6 on the stove top. I find when I cook the chicken at a high heat to start and then reduce it I get a better result. When reduced, I take the temperature down to 2)

I then use this time while the chicken is cooking further to take the coriander stems, chop them off and crush them with the back end of a large knife. 

Put the coriander stems into the stock and start bringing the stock to a simmer.

When the stock is simmering, add in the cooked chicken and chopped coriander leaves. 

Cook further for another 5-10 minutes, tasting as you go and adjusting the seasoning. 

To serve:

Put a small amount of noodles in the bottom of the bowl, sprinkle some extra coriander over the noodles and spoon out some soup. If you want to make it a bit spicy, add some chilli paste now. I'm a big fan of adjusting seasoning, including chilli to taste as you go. 

Photos to come. I made this soup a few weeks ago when the boy was unwell with a nasty cold. He's currently on a low carbohydrate kick and so I excluded the noodles for him, but added them to my meal. It was tasty and easy to make. 

Saturday, April 05, 2014

FOMDAPs friendly ratatoullie

When we were back in Australia my Mum had a weight watchers ratatouille recipe that she adapted to be FODMAPs friendly for me. It was incredibly tasty and it has been something I have made again at home a couple of times. Best bit is that it improves over time and I've used it in different ways. The photo does not do it justice. So tasty!


ratatouille

Ingredients

2 capsicums/peppers, diced
1 medium zucchini, diced
1 eggplant, diced
3 or 4 large tomatoes, chopped or
1 punnet of cherry tomatoes, halved
haloumi*, sliced and pan fried
garlic oil
thyme
basil
oregano
*Haloumi contains lactose, which is a FODMAP. A few slices can be okay for some, less so for others. If you are sensitive you have two options, either omit the haloumi or take some lactase enzyme before having this meal. I risked a few slices and was rewarded with mild bloating but not a huge reaction.


How to do it:


Preheat oven to 180C.

Dice all the vegetables and place them in a baking tray with the garlic oil and herbs.

Cover the tray with foil.

Put the baking tray in the oven and bake for between 1-3 hours, giving the tray a shake every now and again.

Just before you wish to serve, fry the haloumi until golden brown.

To serve, dish up some ratatouille and place haloumi on top.


I have used this ratatouille recipe as a base for vegetarian lasagne. I've added some more tomato to it to make a pasta sauce. It's been a versatile and delicious addition to our repertoire. 


Thursday, March 27, 2014

Potato cakes/scallops -FODMAPs friendly

I have a cohort of Australian friends here in Gothenburg. We have all agreed that the lack of potato cakes/scallops in Sweden is something that is a wee bit shit. 

So back in December we decided to make our own. We also tried dim sims from my FODMAPs cookbook, but we underwhelmed with how they turned out. They tasted fine, but using rice paper for the wrappers didn't really work very well. 

We discovered there were different recipes around for how one might make them and ended up with a mish mash of a few different recipes, combined with some of my old methods for making BBQ potatoes work. 

We used the opportunity of getting together at my house to also watch an episode or two of the Australian comedy Upper Middle Bogan. It was a very Australian Saturday afternoon and I look forward to doing it again. 

I present to you the efforts of our labour, and following that, how you too can do this at home and make FODMAPs friendly potato cakes at home. 


Ingredients


750g large old potatoes
2 cups spelt flour* or gluten free flour
4 tsp baking powder
1 tsp salt
1 3/4 cups soda water
oil for deep frying
extra flour
extra salt 

Method

Wash and peel the potatoes. 

Cut them into thin slices, 0.5cm and arrange on a large plate in a monolayer.

Microwave them for 1 minute on high.

While they cool, prepare your batter.

Sift flour, baking powder and salt into a bowl and make a well in the centre. Gradually add the water, stirring as you go to create a thick batter.

Once the batter is ready, get your oil to temperature. You can test it by dropping a bit of batter in the oil. If it sizzles and rises to the top, you're onto a winner.

Coat the potato slices lightly with the extra flour and shake off the excess.

Dip each slice into the batter to cover it well, removing excess on the side of the bowl.

Deep fry them a couple at a time, until they are golden brown.

Remove with a slotted spoon from the oil and drain on absorbent paper. 

You can refry them a second time, but we found it to not be necessary.

Sprinkle with salt because despite what my father believes, salt on potato cakes is a necessity. 


*I used spelt flour because I've found that I tolerate it well. If you are on the elimination part of the diet I would suggest trying gluten free flour instead to be on the safe side because I've known of FODMAPpers that have had difficulty with spelt. 

Friday, November 22, 2013

FODMAPs friendly waffles

waffles with jam

So here in the Swedens, they do have a gluten free waffle mix. But considering waffle recipes are about the easiest things in the world to make without a mix, I figured I'd just wing it by converting a standard waffle recipe found online.

I was not unhappy with the results. I present to you, FODMAPs friendly waffles that are also gluten free.


Ingredients

3.5 dl (1.5 cups) of gluten free flour
2 tsp baking powder
4dl (1.7 cups) lactose free milk
100g butter, melted
1/2 tsp vanilla seeds, optional 

Mix the flour and baking powder together. Add the milk and stir with a wooden spoon. 

Melt the butter in the microwave and pour into the batter. 

Mix it all together well, making sure to get rid of as many flour clumps as you can. I have found gluten free flour mixes to be quite lumpy when making batter.

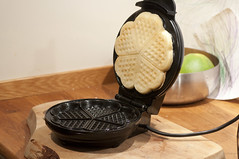
Heat up your waffle iron and get cooking. 
Here's a couple of shots of them almost ready:

cooked wafflealmost cooked


These waffles were just as good as regular ones made with normal flour and really quick to make. We enjoyed them with raspberry and strawberry jam and a tiny bit of ice cream. I used lactose free ice cream for me, but the other two just had regular vanilla.
waffles sans jam


Friday, November 01, 2013

Seafood risotto - FODMAPs friendly

Before I discovered the joys of eating a low FODMAPs diet, we started making our own stock after having a roast chicken (and now I have a FODMAPs friendly version). It seemed to be an easy way to get the most out of our chicken. We quickly discovered that it also tasted fantastic.

We predominantly use stock in our house for risotto. So I have adapted our regular risotto recipe to one that is FODMAPs friendly. It is still super tasty and doesn't make my stomach hurt or blow up like a balloon.

Here's the general gist of it.

Ingredients 

A good glug of garlic oil
4dl arborio rice
1 red capsicum, diced
1 tub of mini prawns
2-3 slices of smoked salmon or gravlax, diced
3/4 cup frozen peas* 
3/4 cup grated parmesan
3/4 cup white wine (optional, but add extra stock if you don't use it)
1 litre chicken stock
1 blob/knob of butter at the end
1 big handful of fresh mint or a good shake or two of dried mint
Juice of half a lemon  

*peas are a moderate FODMAPs containing food and while this portion size should be safe (even on elimination), just be careful with how many you add.

Method

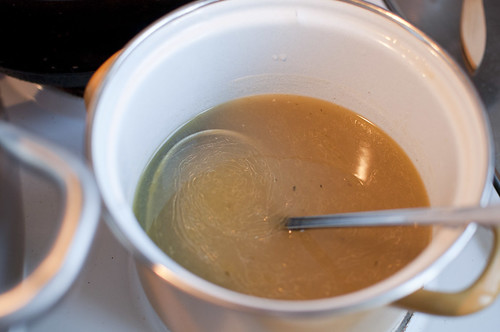
1. Put the stock on a low heat. It should look a bit like this:

warm stock

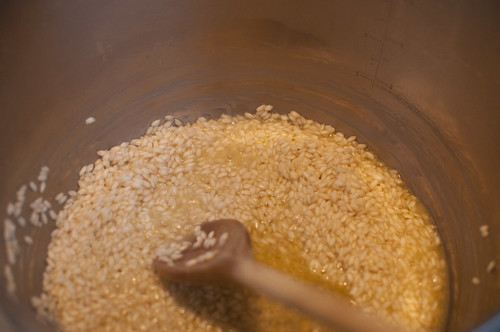
2. Add the garlic oil and rice to a big pot and bring to a medium/medium high heat ( I use 4 out of 6 on our electric stove) and stir with a wooden spoon. At this stage you want to toast the rice. Stir for a few minutes to both coat the rice in oil and to start the cooking process. I generally do this for a few minutes while I make sure I've got everything I need.

3. Add your wine if you are using it. You want the wine to cook off quickly, which is why the toasting before will do you a favour.
If not, add the first ladle full of stock and stir, stir, stir.


4. Continue adding stock, a little at a time,  and stirring. You want it to cook slowly at a simmer, not a boil. You may need to lower the heat a little as you cook. 

5. At this stage I usually start chopping my capsicum between stirs and grate the cheese, get the prawns rinsed and the salmon chopped. 

The rice should look like this when it's on its way to being ready. 

rice underway

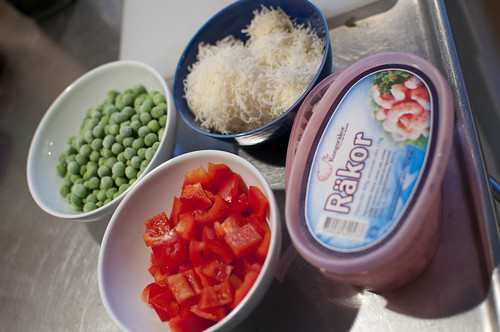
6. When the rice is cooked, it is time to add the other ingredients. Put 2/3 of the parmesan in, the capsicum, the prawns, salmon, peas and mint. Adding them last makes sure you don't overcook the prawns and make them tough. The ones we use are precooked and just need reheating.

ingredients risotto

7. Give the whole thing a good stir to mix it through and heat up the peas to eating temperature. 

8. When the risotto looks ready to go, add the butter and lemon juice, and serve. The consistency I like is fluid but not soggy or gluggy.
Serving on a plate rather than a bowl ensures that your risotto doesn't continue to cook while you are eating it. 


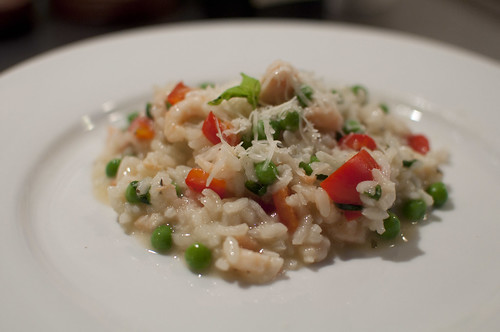
risotto done 2

I like to serve with a bit of mint on the top with some parmesan sprinkled over and the boy loves a bit of cracked pepper. We also like to add a bit more lemon juice when we serve it. I love the acidity of the lemon juice with an unholy passion. TWO is also fond of lemon and delights in squeezing it onto our plates and then just sucking on the remnants of the lemon to get more juice out for herself. 

Risotto is one meal that we can guarantee TWO will eat. She loves it and will eat all the ingredients, even if they aren't ones she is familiar with, or would otherwise reject in other contexts.

The only problem I have encountered with this risotto is that it is so moreish that I am quite often forced to go and eat more later in the evening. Which, in all honesty, is hardly a problem. I always make more than we usually eat in one sitting because it makes excellent leftovers or late night snack.

Pro tip from the boy: if you are planning on storing leftovers, add a bit of stock to your container so that when you reheat, there's enough moisture in it so that it doesn't dry out in the microwave.  

Wednesday, October 16, 2013

FODMAPs friendly salsa

For my 23rd birthday the boy gave me a Mexican cookbook. I really love Mexican food, but the cookbook really only yielded a few things that really helped my cooking. It was a book from the US and suggested I got to my local Hispanic market to pick up the ingredients I needed.

Considering it was 2003 in Melbourne, Australia, that really wasn't an option. But what it did give me was an appreciation for some of the spice mixes that go well together to create a Mexican meal. 

Now a normal salsa contains onion and garlic, both of which are no goes on the FODMAPs diet. I have found onion especially bad for me. So I haven't been able to enjoy salsa from a jar for a good long while now. 

Here is what I do to make my own, delicious, salsa that I love possibly even more than the stuff you buy. The great news is too, that it's cheap, easy and makes lots so you can freeze some for later.


Ingredients:

1 500g tin of chopped tomatoes or about 6 medium tomatoes chopped
a generous glug of garlic oil
1 small tin (150g) of corn* 
2 capsicums/bell peppers diced
half a 400g jar of tomato paste, but feel free to approximate


*corn is moderate in FODMAPs, but fortunately the quantity used in this salsa means that it has been fine for me. 

spices and seasoning:

1 glug of balsamic vinegar
1 tsp sugar
1.5 tsp salt, or to taste
2-3 bay leaves
1 tablespoon dried oregano
3 tsp cumin
1 bunch of fresh coriander/cilantro

other stuff it's useful to have

Some clean glass jars with lids. I just collect the jars of tomato paste and jam and other such things and have them on hand.
A saucepan. 
Wooden spoon, known in our house as a foon because TWO can't say 'sp' properly and it comes out as f. 

how you do it (with pictures!)

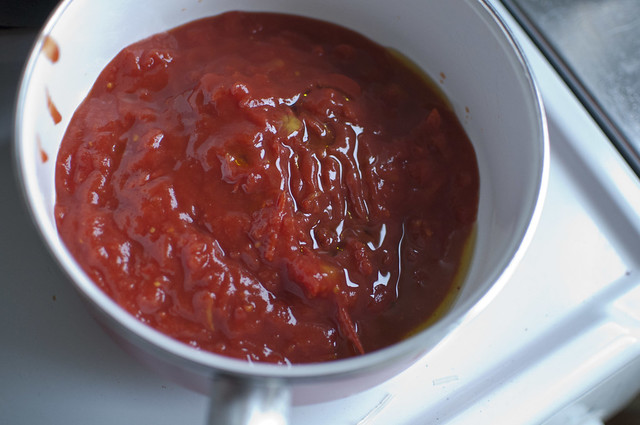
Put your garlic oil and tomatoes in the saucepan, with your tomato paste underneath.

garlic oil added

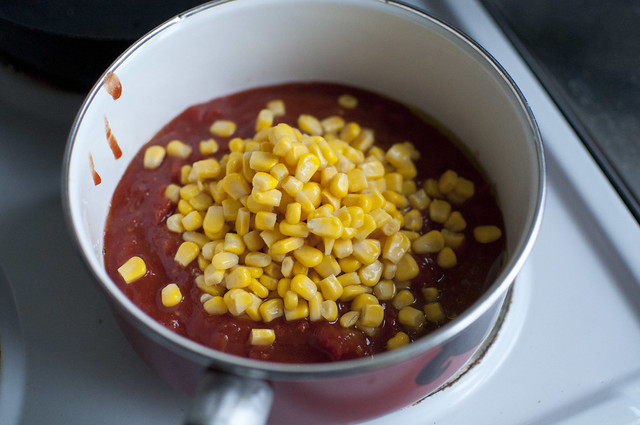
Add the corn.

corn

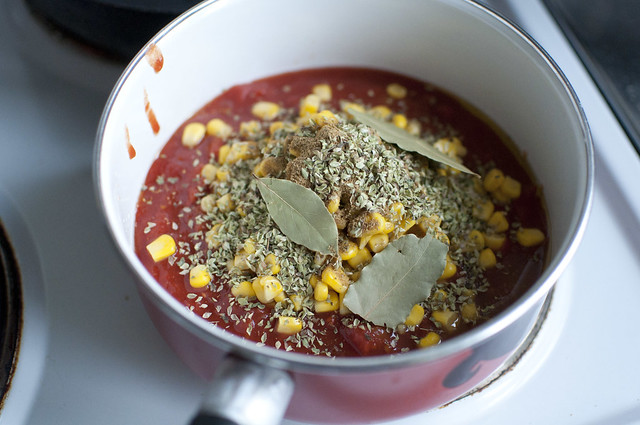
And the spices/seasoning (without the coriander/cilantro).

spices

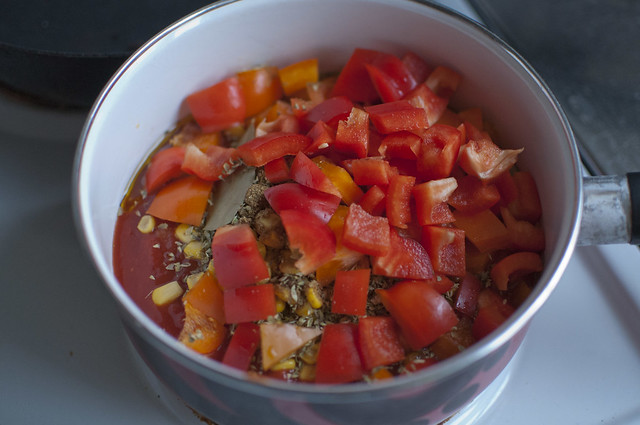
And don't forget those chopped peppers/capsicum.

capsicum

Give it a good stir and simmer on a low to medium heat for a good long while. The longer the better. I am inclined to leave it for 2-3 hours if I have the time available.

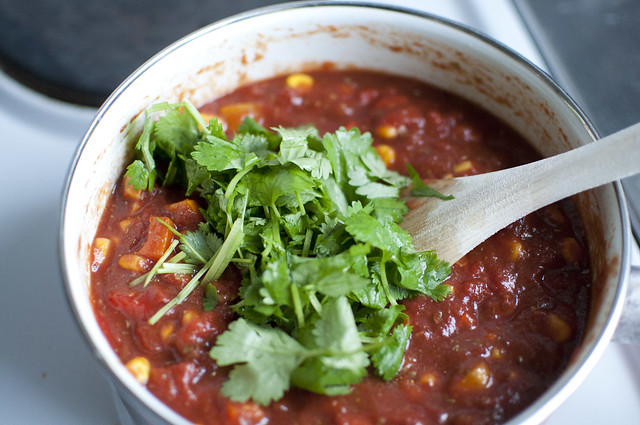
Then don't forget to add the chopped coriander/cilantro.

coriander

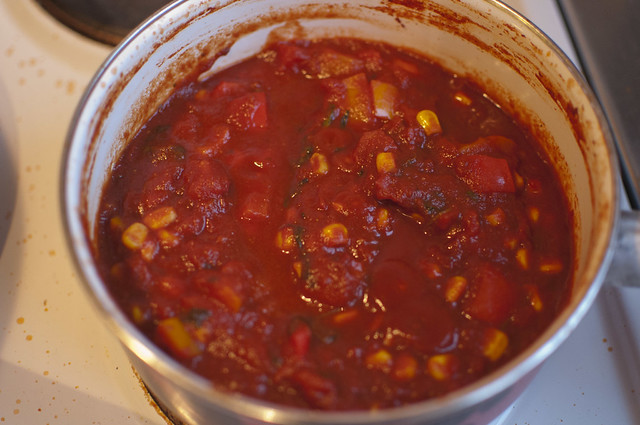
Continue cooking until it looks a bit like this :

salsa done

My best advice is to now taste test the salsa. Does it need more salt? More sugar? Could it do with a touch more tomato paste? Make sure it tastes the way you want it to before you put it away or use it. 

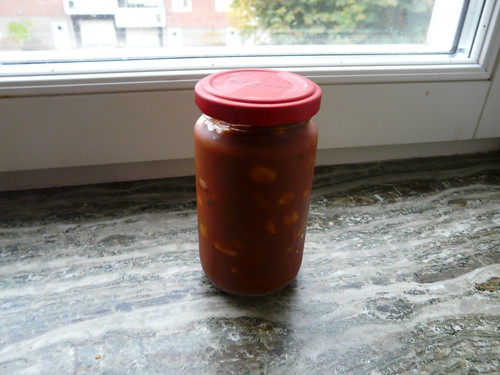
Now get your clean jars and fill them up with yummy salsa. Here's one I prepared earlier. 

salsa in a jar!

I generally freeze those I don't plan on using straight away. I haven't bothered to sterilise the jars in the past because I find that we use a good amount of the salsa fast enough that just having them clean doesn't lead to problems. 

Due to the fact that this salsa doesn't have preservatives added, I find that once opened I need to eat this stuff relatively quickly before mould takes up residence. A few days preferrably. And I also always check it for mould. But I do that with any opened jar of salsa in our fridge. Well, I would do, if we had any commercial stuff in there anymore. 

Tuesday, October 15, 2013

Making chicken stock -FODMAPs friendly

So I mentioned in my post about Thai Pumpkin soup that I used home made chicken stock made in a FODMAPs friendly way. 

My recipe is somewhat flexible, depending on what herbs and vegetables I have available. My most recent stock didn't have any celery in it, despite that being a bit of a standard*. But we couldn't get any at the supermarket and thought it would be good to just run with what we did have. 

After your chicken roast has settled nicely in your belly, strip your chicken and put the carcass and bones into a big pot. Add enough water to cover the bones and add some/any/all of the following vegetables
-zucchini
-carrot
-capsicum/peppers
-parsnip

No need to chop them up finely or anything. Just a rough chop and into the pot. 

Then I like to add fresh thyme and a couple of bay leaves to my stockpot and a bit of my garlic oil

Now comes the lazy and useful part. Boil that stock gently for a good long while. A few hours at least. Many people when talking about stock will tell you to skim off any scum that forms on the top. I've yet to find it necessary. 

After your gentle boil of several hours, it is time to strain your stock. We have a fine colander that works well to let stock through but keeps the bones and herbs and veg stuck. 

Turf your big bits into the compost or regular bin and take your stock and put it in the fridge.

Because I haven't added salt to this stock as I make it, it does generally need a bit of salt for use later on, otherwise the taste is off. I generally add the salt to taste when I'm cooking with the stock later. Like in our risotto that is the usual follow on from making stock. I'm making some tonight, I might get some photos of that to add here too because the recipe is so tasty and with homemade stock it is even better than normal risotto. So. Much. Flavour. 

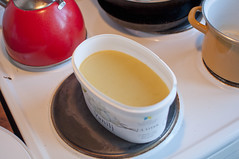
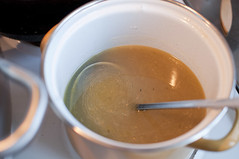
Here are pictures of said stock before and after heating. I particularly love that you can see the layer of solidified fat on the top. 

stock topwarm stock


*celery contains mannitol but I've found that I tolerate it okay in stock. If you are on elimination, give it a miss.

Monday, October 14, 2013

Making garlic oil -FODMAPs recipe

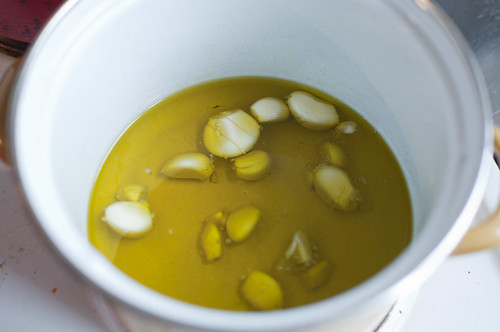
garlic oil close up


I love garlic. With a passion. Alas, garlic does not love me. The belly is most unhappy if I eat too much of it. Too much can be quantified as some these days. So I make garlic oil to use in all my dishes that need a bit of a garlic flavour to help enhance the flavour of my meals. 

I thought it might be something that others might enjoy/find useful so I thought I'd write it down for future reference. 

It's also important to not leave cloves of raw garlic infusing in oil as you would with other infused oils. There is a risk of botulism. Which is why you do the following:
  1. Get 100ml or so of your oil of choice and put it in a pan
  2. Add a few cloves of garlic. If you need specifics, add 5
  3. Fry those little cloves until they are nice and brown, 5-10 minutes is recommended to kill off bacteria, nice and hot. 
  4. Let the oil cool and then remove the cloves and decant your oil into an old oil bottle that you have sitting around. Obviously you can use any container you want, but we go through olive oil relatively quickly, so we have a bottle set aside reasonably frequently
  5. Profit!  and/or garlic oil for your consumption and delight
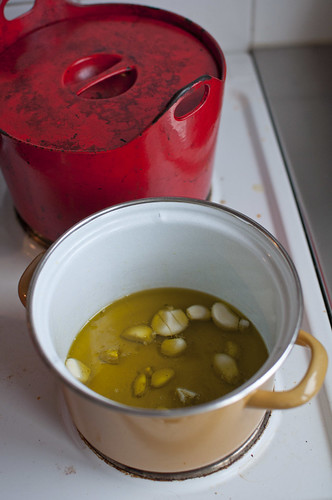
garlic oil

Friday, October 04, 2013

My third Washi - a tale of a dress that has many iterations

washi knit

I am an enthusiastic sewer of things. That is sew er, as opposed to sewer where the toilet waste goes. I didn't have a sewing machine here for a long time and it was only when TWO was almost 1 year old that I got one. 

I am also prone to my belly blowing up like a balloon due to eating the wrong foods. Irritable bowel syndrome (IBS) has been the bane of my Swedish existence. Starting some six to eight months after I moved here, I had a stomach that would range from the normal "fitting into my clothes from the start of the day to the end" to "not fitting because I looked about six months pregnant" with all the contained gases. I would also regularly have horrible attacks which would leave me feeling incredibly sick and sorry for myself. The phrase 'peeing out of my arse while feeling like I want to vomit copiously' comes to mind. Really rather unpleasant.

As a result of the unpredictable (until recently) nature of the size of my gut, I have spent a goodly amount of time looking for clothing that compensates and allows for a variable gut size. The washi dress from made by rae is one such item that came to my attention as perfect for those days when I was blown up like the aforementioned balloon.

It is also a great "all you can eat" dress, which also compensates for overconsumption of delicious food.

I have made three washis in total thus far and have plans for at least four more. The first two followed the basic pattern appropriately and I made a size M which worked well. But I wanted a stretchy one for the summer. 

So here's what I did to alter it and how it ended up.

I made a S size rather than a M to allow for the extra ease/stretch in a knit fabric. I then lowered the neckline a bit and took up the shoulders about an inch. This is mostly because I am quite short between my shoulders and bustline and I had problems with the armholes being a bit low. I added a couple of rows of extra shirring on the back to avoid a puffy top section of the back of the dress. 

I also used some cheap remnant fabric that I picked up at my local fabric store, so I wasn't wasting expensive knit fabric on what was a (hopefully wearable) muslin. So the stripes aren't exactly straight everywhere, but I'm still pretty pleased with how it worked out. 

I hope you can see that I'm a bit happy with it and a couple of close ups to see the details of the neckline. I just finished the edges by folding them over and sewing them down. I think next time I might use some vliesofix to make it a bit more sturdy. 

Enjoy!
washi knit2

shirred to perfectionfront and center

Sunday, September 15, 2013

Low FODMAPs Thai Pumpkin Soup Recipe

Since moving to Sweden in 2009, I began to have gastrointestinal issues I'd never had before. I was bloating a lot, having rather unpleasant IBS style attacks at least once a week and I couldn't pinpoint the cause. I tried all manner of things and couldn't manage to work out what it was. 

Cut to 2011 and one of the women in my online Mums group in Australia suggested I look into fructose intolerance. She said her husband had it and his symptoms sounded the same as mine. I was rather skeptical, as I felt I had exhausted so many possibilities previously with no reduction in symptoms.

I emailed a dear friend in Tassie who is a hospital dietician/nutritionist and asked her if she had any information about what I should do. She said she didn't know too much about it and sent me what info she did have. 

FODMAPs is an acronym that stands for Fermentable Oligo- Di- Mono-saccharides And Polyols (brief wiki summary here). It's effectively sugars that are fermented in the guts of people like myself. The fermentation process means that you get IBS symptoms, like bloating, distension,  diarrhea and/or constipation. 

Since I started on the low FODMAPs diet, my symptoms have not just improved, they have disappeared. The only time I get a return of symptoms is if I slip up and have too much of any of the FODMAPs. 

I have performed a few experiments on myself in this regard and I can tell you that wheat is a total no no, as is honey unfortunately. But the experiments have determined that nothing more terrible than a little extra gas happens as a result of a glass and a half of riesling. So I'm hopeful for a return to very occasional and small quantity wine drinking. 

Huzzah! 

So I have gone about adapting some of my existing recipes to ones that are FODMAPs friendly and mean that I've got some variation in my diet from my 'safe' meals. 

My Mum had a Thai pumpkin soup recipe that I tried out for the first time about 18 months ago. And here is my adjusted FODMAPs friendly version.  


Ingredients:

1 kg pumpkin*, peeled and diced
1 tablespoon garlic oil**
1 teaspoon sambal oelek

2 kaffir lime leaves (optional)
2 tablespoon chopped fresh lemon grass
4 cups chicken stock (FODMAPs friendly***)
1 teaspoon fish sauce
The juice of a good juicy lime (original recipe says 3 tsp but I like sour)
1 cup coconut cream
2 tablespoons fresh basil
2 tablespoons fresh coriander


Method:


  1. Heat oil in a pan, add sambal oelek, lime leaves and lemon grass. 
  2. Cook on a medium heat until fragrant.
  3. Add pumpkin, cook stirring 1 minute, or in my case until your stock has defrosted and you can get it out of the tupperware.
  4. Add stock, fish sauce and lime juice.
  5. Simmer, covered until pumpkin is just tender. 
  6. Remove lime leaves.
  7. Blend your delicious cooked pumpkin.
  8. Add coconut cream and herbs to pumpkin mixture, stir until heated through
  9. Serve!

If you fancy making this the non-FODMAPs friendly way, add two cloves of crushed garlic at the start with a chopped onion when frying off the sambal oelek, lime leaves and lemon grass.


*So while I use butternut squash, being the one pumpkin that is readily available in Sweden. It is a moderate FODMAPs containing food and the portion needs to be limited. However, Jap/Kent/Kabocha pumpkins are considered safe on the app provided by Monash University. So if you can, get one of those. 
**You can get the flavour of garlic without the pain by sauteing a couple of cloves of garlic in your oil of choice for a few minutes and then removing the garlic. I usually make 100-200ml at at time with a good number of cloves to have on hand when I want my oil flavoured. Whatever you do though, don't use fresh garlic and let it infuse in the oil. That way leads to potential botulism and I'd hate to be responsible for that. 

***we regularly make a roast chicken and take the opportunity to make a stock with the carcass. The stock is then usually used in our risotto. It is both delicious and friendly to my belly. I will write a FODMAPs stock recipe soon, but suffice to say, it excludes onion and garlic, but doesn't lack in flavour. And the recipe has been blogged.